22 May 2011 02:02:11
Today I took a chance at fabricating a cape; specifically for 1/12 figures. I always did want a true fabric cape for cape equipped figures rather than poseable figures having hard plastic capes. Although I should mention figma Knight and Siren have nice fabric capes, so here is my attempt at making my own.
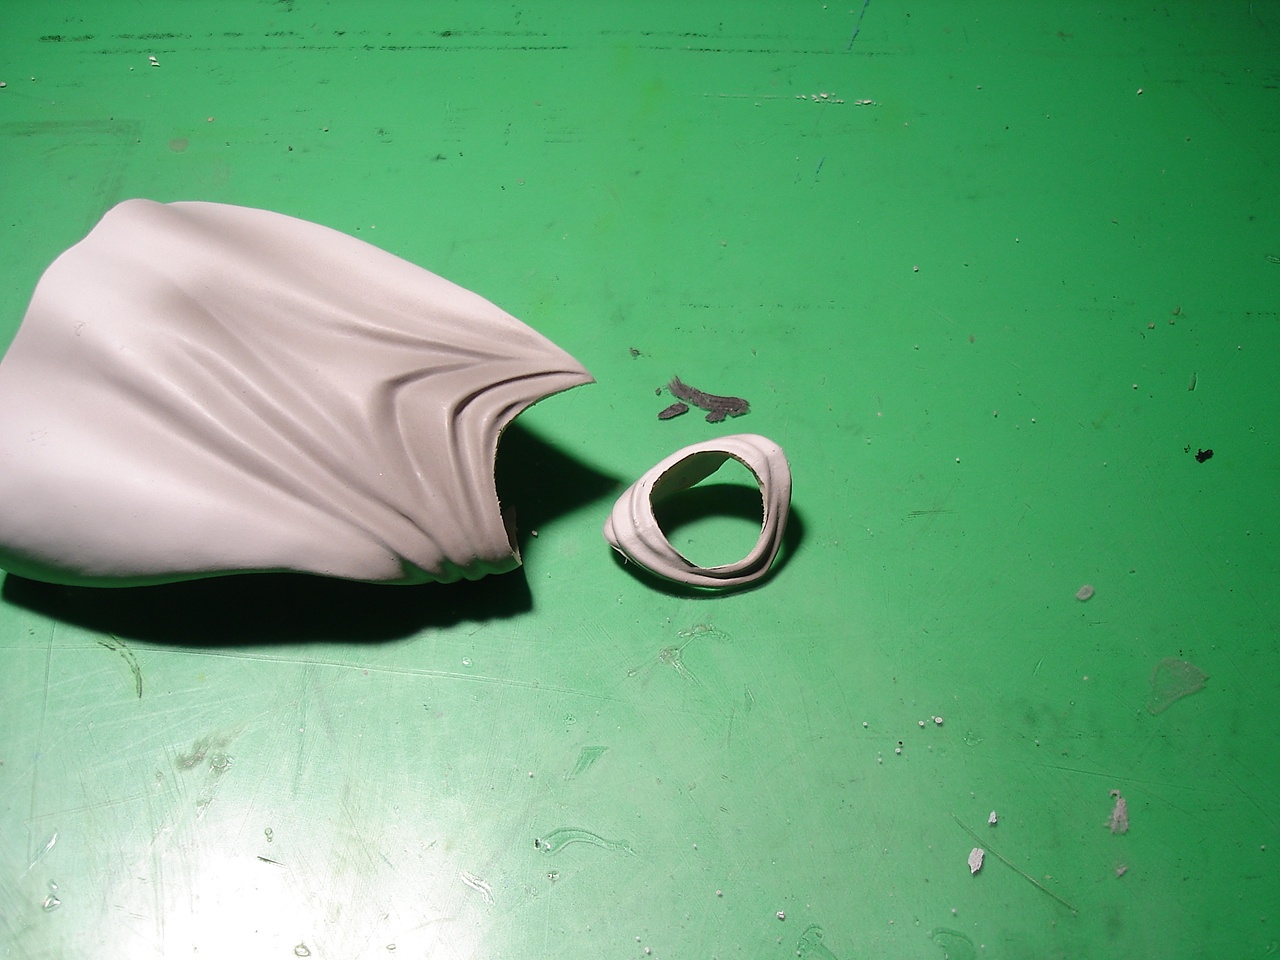
First I wanted to make the "hooded" part of the cape, and I decided to make this part out of plastic. I took a generic plastic and somewhat useless cape and just cut away the unnecessary parts off.
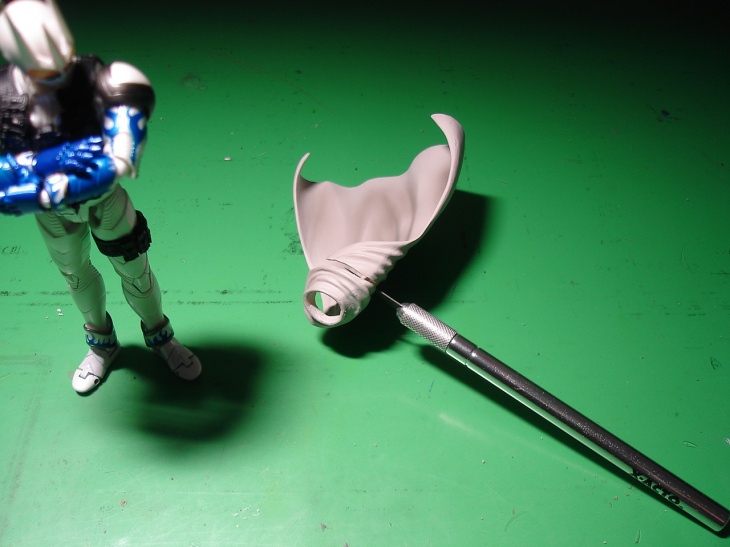
Leaving with a nice secure ring to put the head through, shown in the photo below.


Next is for the actual fabric cape; I drew out and cut out a paper stencil for myself.
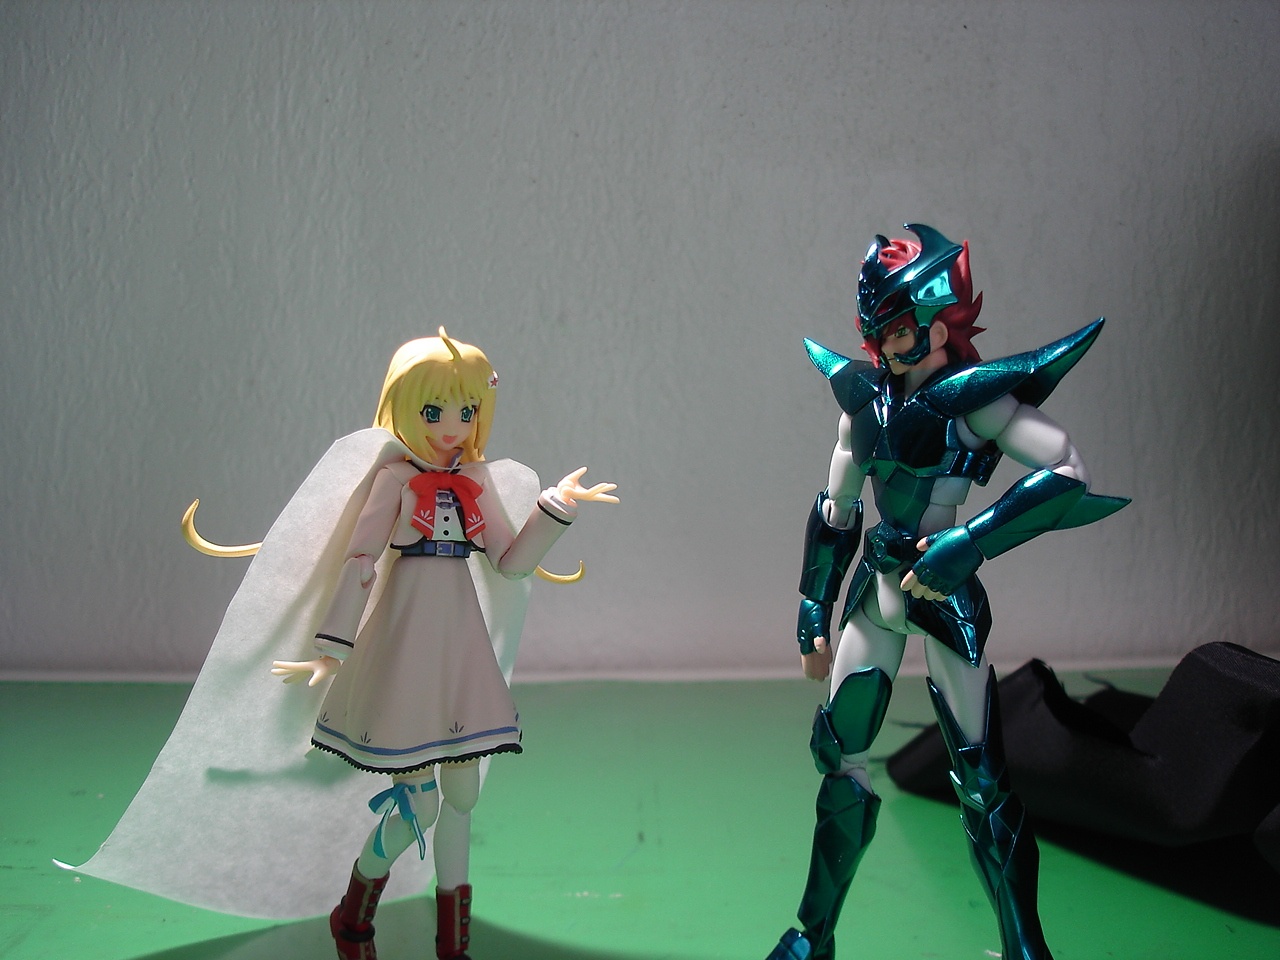
Aya Kagura: Does this make me look fat?
Alberich: Nope, but it looks kind of cheap.
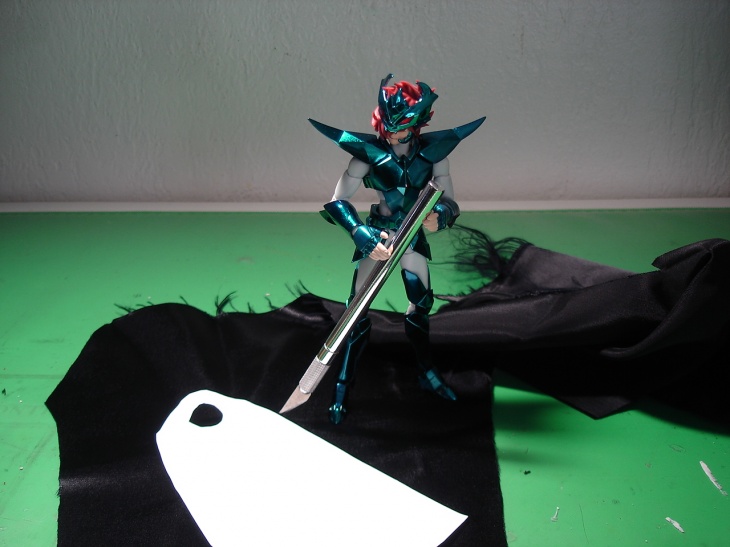
After 5 terrible attempts, I managed to cut and sew a 1:12 scaled cape. I had to sew because one layer is a bit too thin and lacks weight, so I double-layered it. Oh I sadly could not take any pictures of me sewing since my hands were full obviously.
From that point, I just painted the plastic hooded part black and sealed it with some gloss varnish. I admit I should of used pledge with future shine for a varnish, but I just went with a vallejo gloss varnish for the sake of convenience.
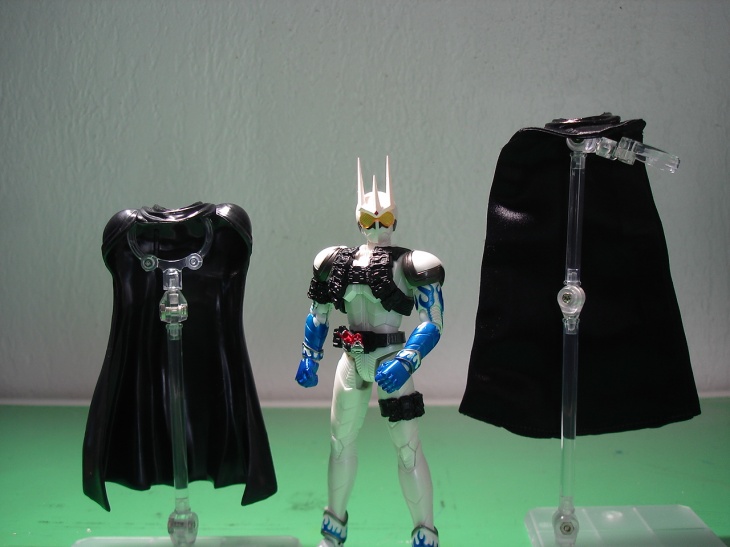
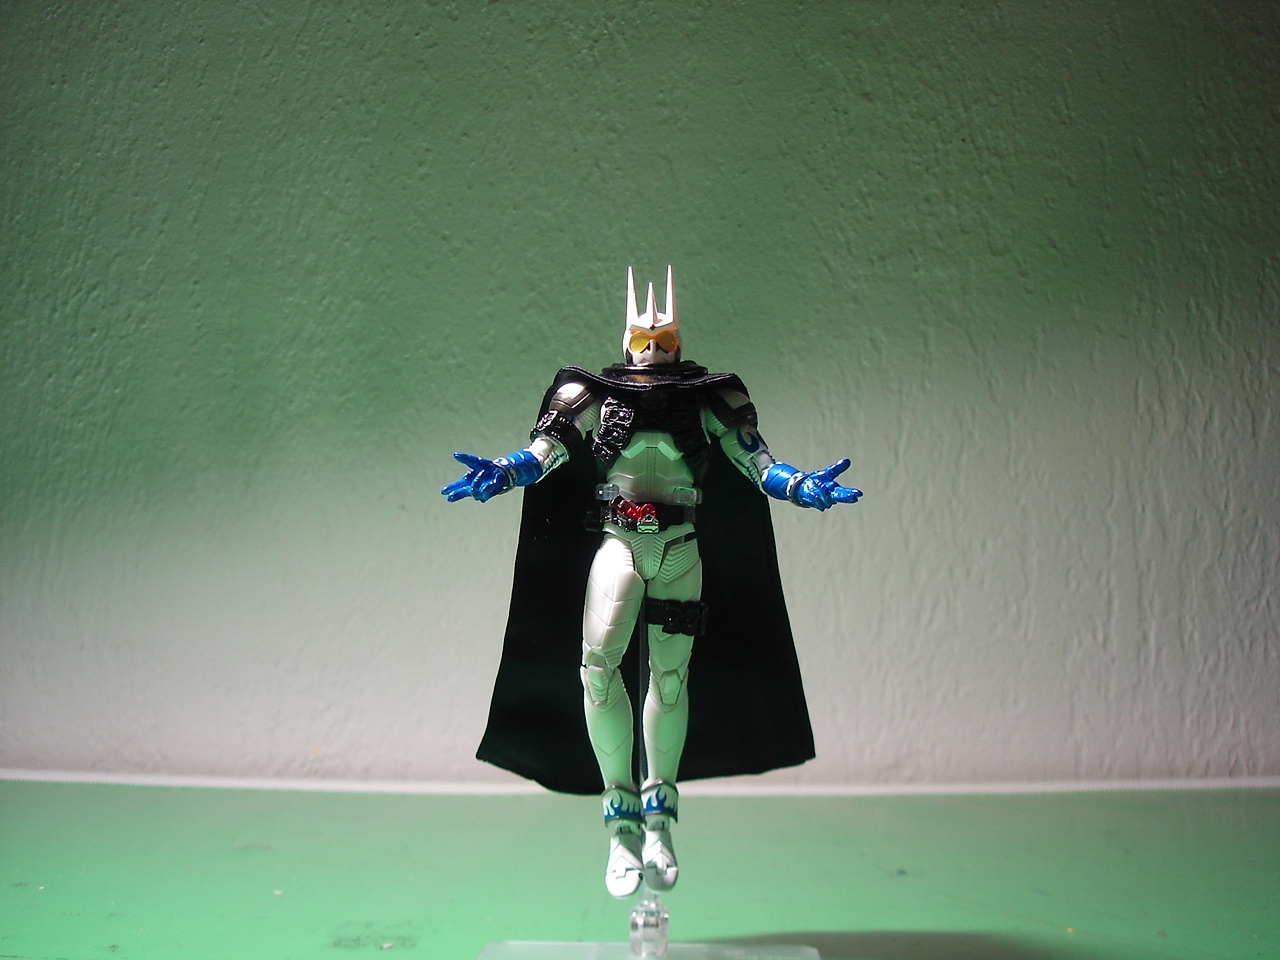
Comparison of capes above, the plastic cape Eternal originally came with is on the left, the one I made on the right.

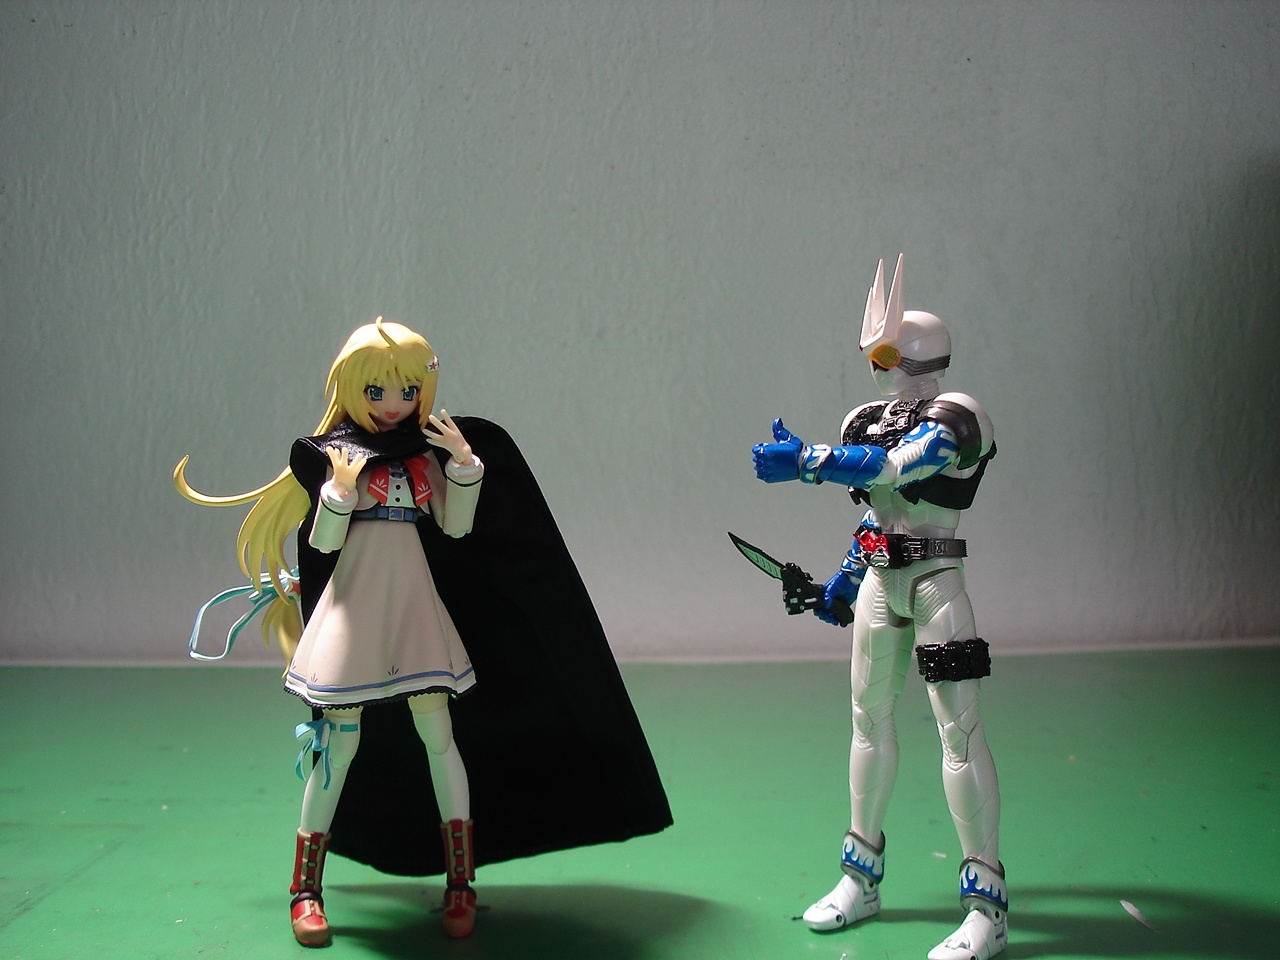
Aya Kagura: How do I look?
Eternal: Fabulous

Overall, the cape is not 100% accurate, but it looks pretty good. It certainly has that nice shiny look to it like a real cape should, but the amount of energy and time I spent on it reminds me to not underestimate a task. I thought it would only take a hour at most. I'm just glad it did not fall apart and I now have a cape for my figures to use. Nonetheless, thanks for reading my blog.
First I wanted to make the "hooded" part of the cape, and I decided to make this part out of plastic. I took a generic plastic and somewhat useless cape and just cut away the unnecessary parts off.

Leaving with a nice secure ring to put the head through, shown in the photo below.

Next is for the actual fabric cape; I drew out and cut out a paper stencil for myself.
Aya Kagura: Does this make me look fat?
Alberich: Nope, but it looks kind of cheap.

After 5 terrible attempts, I managed to cut and sew a 1:12 scaled cape. I had to sew because one layer is a bit too thin and lacks weight, so I double-layered it. Oh I sadly could not take any pictures of me sewing since my hands were full obviously.
From that point, I just painted the plastic hooded part black and sealed it with some gloss varnish. I admit I should of used pledge with future shine for a varnish, but I just went with a vallejo gloss varnish for the sake of convenience.

Comparison of capes above, the plastic cape Eternal originally came with is on the left, the one I made on the right.
Aya Kagura: How do I look?
Eternal: Fabulous
Overall, the cape is not 100% accurate, but it looks pretty good. It certainly has that nice shiny look to it like a real cape should, but the amount of energy and time I spent on it reminds me to not underestimate a task. I thought it would only take a hour at most. I'm just glad it did not fall apart and I now have a cape for my figures to use. Nonetheless, thanks for reading my blog.